One of these hoses was a short plastic coil hose, and I thought, wow, this hose would be just perfect with my mini compressor.
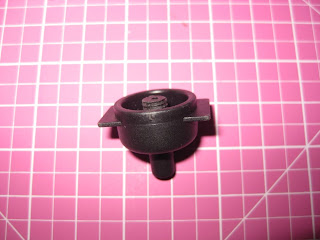
Unfortunately, the sparmax dac-25 hose connection on the compressor is some kind of plastic non-standard format. This means that you can't really use any standard airbrush hose. So, I decided it was time for a case mod.
I decided that while I was at it, I would install a switch on the side of the compressor as well.
WARNING! The rest of this post is a teeny tiny bit technical, so if you don't really know how to use a soldering iron, you might just want to look at the pictures :)
Since I stand my compressor on it's side wedged between two dividers in my makeup case, I cannot access the main power switch, not to mention the sparmax dac-25 has a weird power scheme which requires you unplug the battery/ac adapter when not in use to avoid power drain.
The power from the main battery connection is diverted to two main circuits, the LED, and the actual motor. The LED circuit is always connected if the unit is plugged in. The motor circuit is controlled by the main power switch. This means that regardless of the switch position, the LED will always be draining the battery if it's plugged in. While LEDs use a very small amount of electricity, it seems pointless to me to have them on two different circuits.
I decided on two main mods. I decided to change the connection on the compressor to a quick disconnect, and add in a flip switch near the power receptacle.
First, I found a washer/spacer at lowes that would fit my quick disconnect attachment, then I drilled out a hole in the plastic right where the old connector was, exactly big enough for the threaded end of the quick disconnect to fit. I then attached the spacer and screwed on a plastic hose converter, and plugged the plastic hose into it.
I then drilled out a very small hole next to the power receptacle, and screwed in a flip switch. I used a desoldering pump to detach the two wires from the positive terminal on the power receptacle, and attached them to one end of my switch, then soldered the other end of the switch back to the positive terminal.
Put it all back together, and voila! I can now use any hose I want, and remove the hose quickly and easily so I can close my case :)
This does make my original sparmax dac-25 hose that came with it, useless, as it only has that non-standard plastic threading, but I think i'll keep it around for parts.
I did breadboard some alternative ideas, but I think the only other one I am really considering is using some limiters and maybe a three-way switch so I could have, off, full power and half power. Not too sure on the usefulness of this, but it's an idea. I checked out some rotary switches on mcmaster, and digikey, but they are all too large to fit into the limited space available inside the case.
>>>>>>>>>>>>>>>>>>>>>>>>>>>>>>>>>>>>>>>>>>>>>
I decided to also alter my other sparmax dac-25 which came with my OCC set I bought a while ago. It's white instead of the temptu's black, but is otherwise the same. I added a picture journal of the steps I took.
I also shaved down the plastic end of the hose and screwed on the quick connect nib so the hose is still useable with the compressor.


No comments:
Post a Comment